
This article will teach you to integrate your Cirrus site with your DocuSign account
With the new release of eSignature capabilities in Cirrus, it is important to know how to set up the integration for your site. When it is set up, the integration will let you send files and templates for signature, straight from your Cirrus site. This will save you time and effort, while also bringing the documents back into your Cirrus site for better organization.
The steps involved in the setup occur both in the DocuSign website and in the Cirrus Admin menu. Follow these steps to setup up your eSignature integration:
- Log in to your DocuSign account
- Click on Admin across the top header
- Along the left Sidenav, Click Integrations > API and Keys
- On the API and Keys page, under My Account Information, copy the values for user ID and APi Account ID
- Under My Apps/Integration Keys, click the “Add” button
- Create the new Application called “Cirrus Secure Integration”
- After creating the Application, copy the Integration Key/Client ID
- Scroll down to Authentication
- Under user Application, click Implicit Grant
- Under Service Integration, Add RSA Keypair and copy both the PUBLIC Key and PRIVATE KEY values
- *IMPORTANT* this is the 1 and only time these values will be displayed to you, so please be sure to copy these values into a safe place where you don’t lose them
- Under Additional Settings, click ADD URI, and enter: https://<yourdomainname>/ESignature/DocuSignConsent
- Login to Cirrus
- Navigate to Administration > System Setup > Settings
- Don’t Check “eSignature Enabled” until the end
- Click on the eSignature Settings Tab
- For eSignature Provider, select DocuSign
- For DocuSign SANDBOX, the AuthServer is: account-d.docusign.com
- For DocuSign Production, the AuthServer is: account.docusign.com
- For ClientID, enter the Integration Key/Client ID that you copied above in step 7
- For EventNotificationURL, leave blank *UNLESS* you know you have a proxy server
- For ImpersonatedUserGuid, enter the User ID that you copied in step 4
- For PrivateKey, enter the Private Key that you copied from step 8b
- For Scopes, enter “Signature Impersonation”
- For TargetAccountId, enter the API Account ID you copied above in step 4
- For UseEmbedded Signing, click TRUE
- For UseWebHooks, click TRUE
- Click Save All
- Scroll to the bottom and click the TEST eSignature button
- A new tab/window will open to a DocuSign URL, prompting you to provide consent. Click Accept. You will be redirected to a confirmation page within Cirrus, and you can close the new tab/window.
- Back in the original Cirrus window, click the TEST eSignature button again, and verify that a success message appears
- Scroll to the top and check the eSignature Enabled checkbox, and then click the Save All button
- After you receive the Save Successful confirmation message, you MUST refresh your browser in order to continue
At this point, your Cirrus account is fully configured and connected to your DocuSign account. The next step is to enable eSignature for your Doc Titles.
29. Within Cirrus, navigate to Administration > Checklist Setup > DocTitles
30. For the DocTitle(s) you wish to enable eSignature for, select the DocTitle, then in the actions menu, click Actions > Edit
31. In the Edit Doc Titles Modal that appears, check the eSignature enabled checkbox
32. If you want your eSignature template to be defined internally within Cirrus, select the “expected Format Checklist Document” you want to reference
Use the new Document Mapping Interface to help configure for e-Signature:
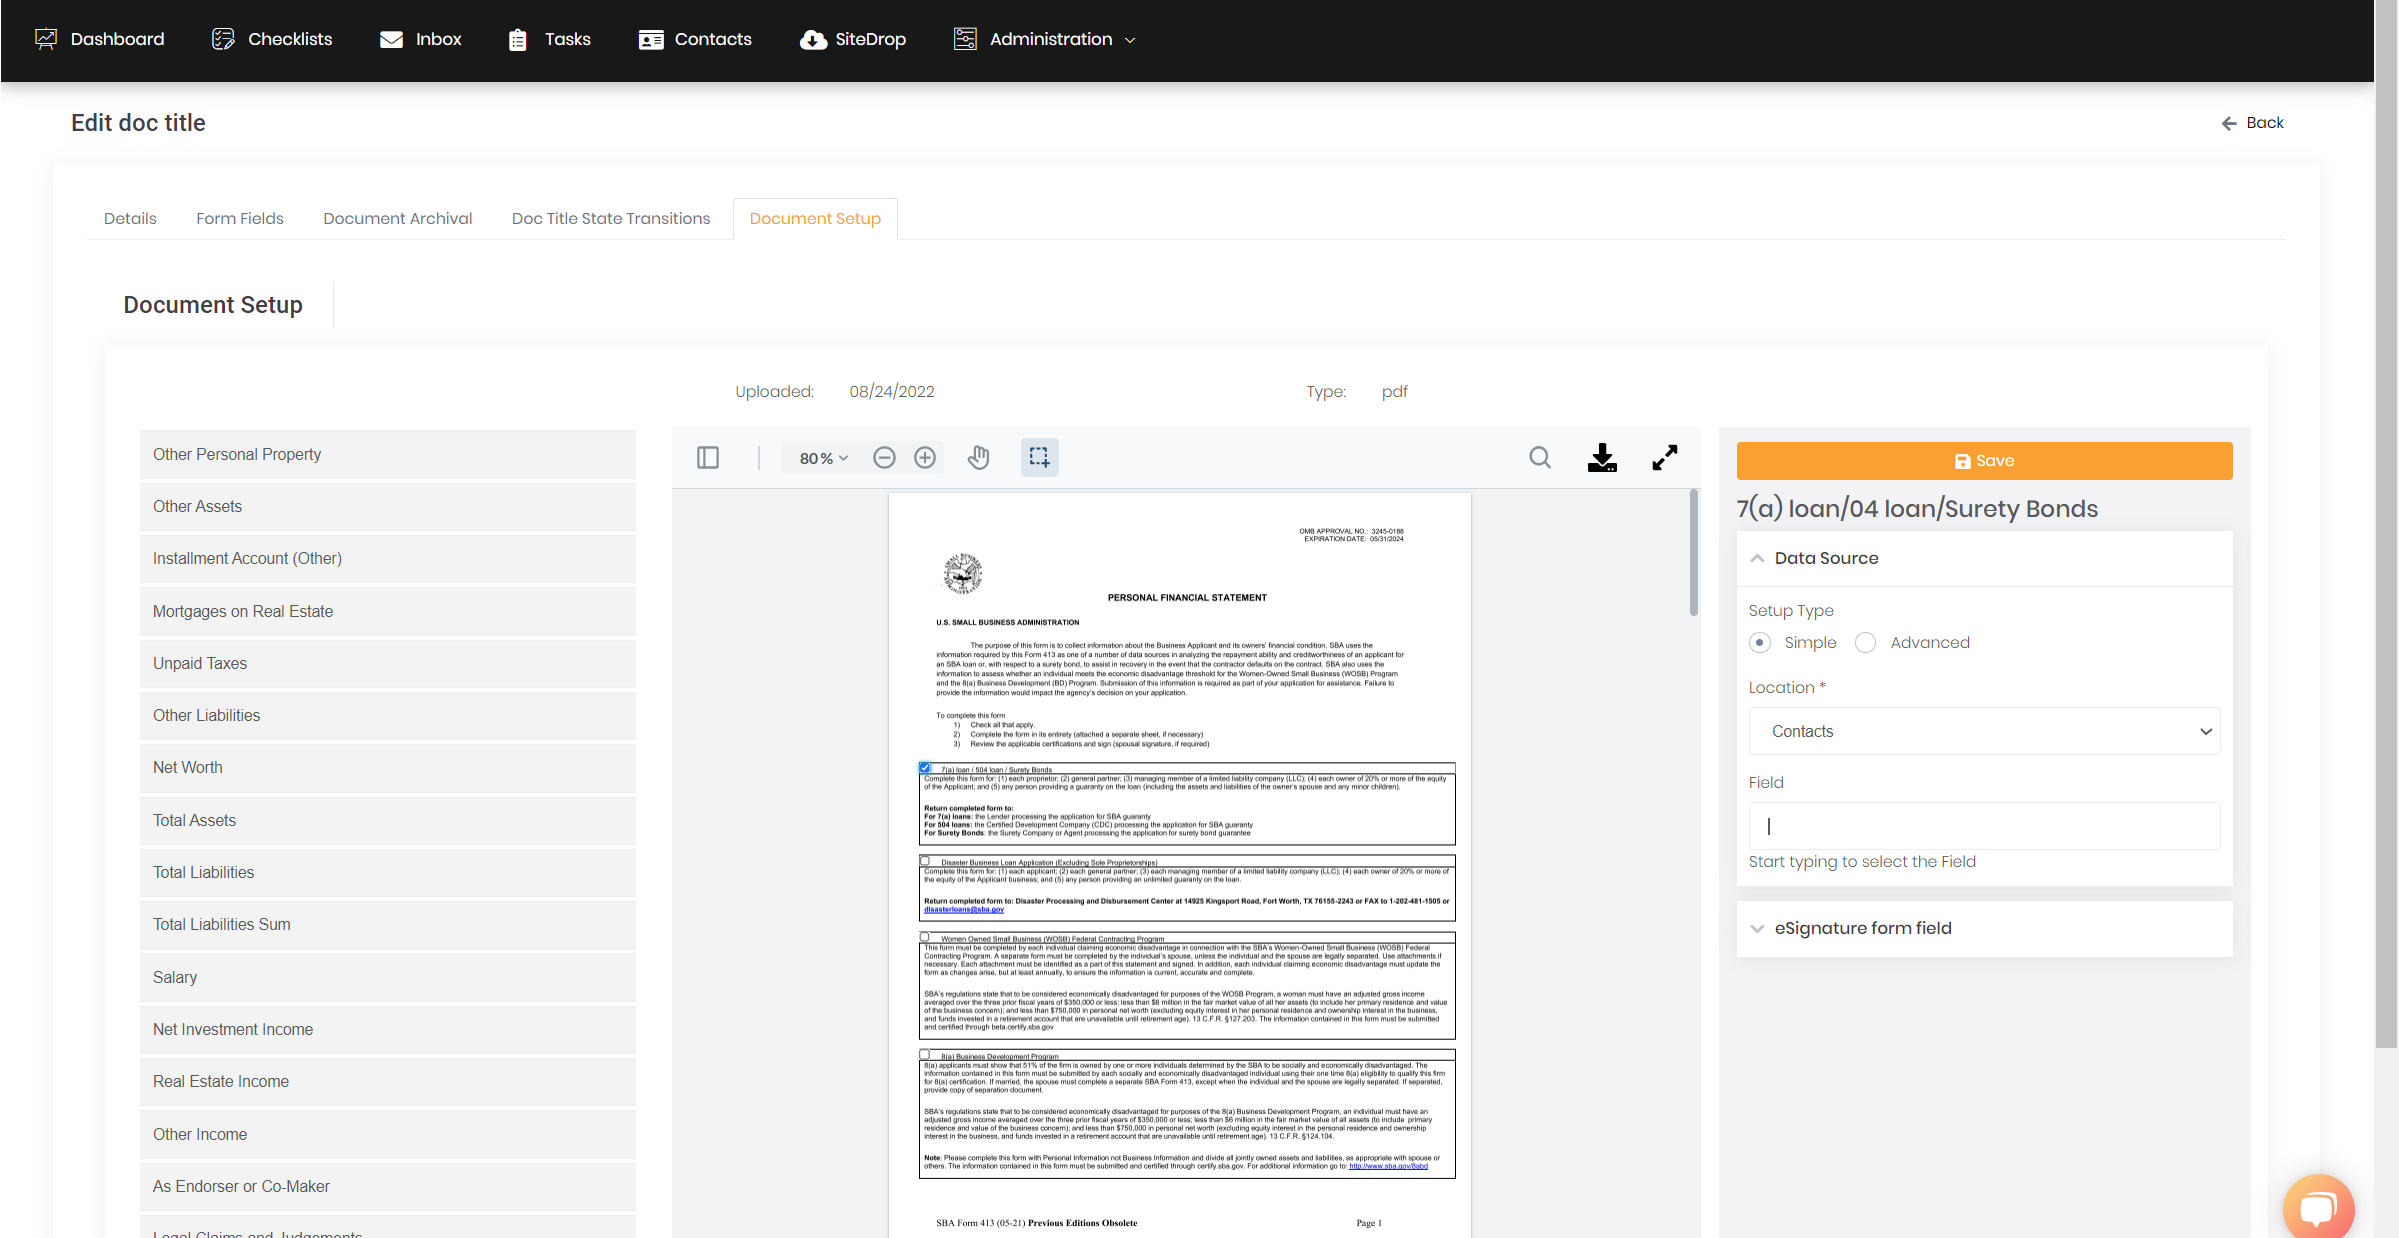
33. In the DocTitle details page, click on the “Document Setup” tab
34. The left-hand side bar lists the form fields in the document. The center panel shows a preview of the document. The right-hand side bar shows the “Merge Tag” that is applied to this field. use the Location to find the Object you want your field to come from, and type ahead in Field to find the specific field.
35. Do not forget to click Save!
Click here for information on Merge Tags.